Showing posts with label System. Show all posts

Tuesday, July 8, 2014

Share a hard drive with everyone on your Wi-Fi network

Take advantage of your router's USB port with a little trick that lets you share a hard drive with anyone on your Wi-Fi network.
Cloud storage is expensive, but it's not the only way to share a bunch of files across many devices. Instead, you can use an external hard drive and your router to create networked storage accessible to anyone on your Wi-Fi network.
When it's set up, any files stored on that drive can be accessed by all devices on your network -- even phones and tablets. Here's how to set it up on Windows.

Step 1: Choose your drive

The drive you share can be as small as thumb drive, or as large as a 3TB external hard drive. Check your router's manual to find out if there are any storage limitations, since some routers have a storage cap.
Once you've chosen your drive, plug it in.

Step 2: Enable USB drive sharing

On any computer connected to your Wi-Fi network, launch a browser, and navigate to your router's IP address. You can find this on the back of the router, in the device manual, or by searching for it online. In most cases, it looks like 192.168.X.X.
When the page loads, you'll be asked to log in with your username and password. If you changed it, you should know it. If you didn't, it's probably still admin (username), and admin (password).
Those who fall into the latter category, please change your password as soon as you can, and before proceeding to the next step.
Every router's interface is different, but if yours has a USB port, you'll find a link entitled something likeFile Sharing under the Administrator settings. In this window, enable the file sharing server (also called SAMBA). Apply the settings, and exit.
enablefilesharing.jpg
Screenshot/Sharon Profis

Step 3: Access the drive

You're now ready to read and write to your attached hard drive. Open a file explorer window, and navigate to the Network folder in the left sidebar. Then, clear out the path at the top of the explorer window, and enter \\[your IP address]. So, for example, it might look like: \\192.168.1.1
networkfolder.jpg
Screenshot/Sharon Profis
With that, your drive will appear. Open it to access its contents, just like any other folder. If you're asked to log in, simply use your router's login credentials (the same one used to log into the Web interface.)
If you plan on leaving your hard drive attached, so that you can easily access it from any Explorer window. To do that, right-click the drive and select "Map network drive..." Give it a name, and the folder will appear in the sidebar.
mapdrive.jpg
Screenshot/Sharon Profis
To access the drive on other computers on the network, repeat step 3.

Thursday, July 3, 2014

Microsoft flips switch on new webmail encryption

Microsoft has pulled back the curtain on its implementation of tougher encryption standardsfor Web-based email and some cloud services, the company announced Tuesday.
In the works for more than six months, Microsoft has now activated Transport Layer Security encryption (TLS) for its webmail services at Outlook.com, Hotmail.com, Live.com, and MSN.com. This means it will be significantly harder for email originating from and being sent to a Microsoft account to be spied on, as long as the connecting email service also uses TLS.
Matt Thomlinson, vice president of Microsoft's Trustworthy Computing division, said that this work is part of a "comprehensive engineering effort to strengthen encryption."
"This effort also helps us reinforce that governments use appropriate legal processes, not technical brute force, if they want access to that data," he said.
Although Thomlinson didn't specify the origins of this work, Microsoft's heightened encryption efforts follow an October 2013 report that the NSA had been spying on Internet giants in a program called Muscular. The report was based on documents leaked by one-time National Security Agency contractor Edward Snowden.
Microsoft's move also comes just a few weeks after a well-publicized Google webmail report that painted Redmond in less than flattering colors. Google scored Microsoft, along with Comcast and Apple, as webmail providers with inadequate levels of encryption to protect their users' email.
Comcast and Microsoft representatives told CNET at the time of Google's report that their companies were in the process of implementing TLS for their webmail services. Apple did not return a request for comment.
Microsoft also has activated Perfect Forward Secrecy encryption (PFS) for its cloud storage service OneDrive. The OneDrive website, OneDrive mobile apps, and OneDrive syncing tools will now all use the tougher PFS encryption standard, which protects user confidentiality even when an third-party is eavesdropping on the network.
Finally, Microsoft has opened a "transparency center" at its headquarters in Redmond, Wash., where governments can review Microsoft source code for "key products" to confirm that no hidden backdoors have been added to the software. Microsoft has not revealed which of its products will be available for review.
CNET

Saturday, October 26, 2013

Awesome Tool to Improve Your Website Speed

Recently I started trying to optimize the loading speed of my websites, after the number of people using mobile devices and 3G or similar connections is exploding, and those connections are not the fastest.
One of the best tools I came across for this purpose is calledGTMetrix.com. You just need to input your website URL and it will run a very comprehensive speed test.
website-speed-tool
Once the test is complete you’ll get a grade and recommendations from both Google’s Page Speed and Yahoo’s YSlow plugins. Going through both list of recommendations will certainly give you many pointers to start working on.
Check it out!

Friday, June 7, 2013

Create Ghost Bootable SD Card or USB Flash Drive

Create Ghost Bootable SD Card or USB Flash Drive

It's a good practice to create an image of your hard drive before you start using it. Especially when you had to build that computer from scratch and spent hours installing the operating system and all of your favorite apps...

As Symantec Ghost becomes more user friendly, people start to recognize this idea. The idea also works well when you need to clean your PC from viruses. In case anything goes wrong with the operating system, you just need to restore the image using the Symantec bootable CD.

However, the problem comes when we deal with the new version of those small laptops: The netbooks! which usually don't come with a built-in CD-ROM drive to bootup the PC.
The most simple solution would be buying an external CD-ROM drive, which costs you money. And in some cases, you just want to bootup the Symantec Ghost.... with whatever available!


The good news: Almost every recent laptop/netbook comes with a card reader, and even if you wasn't lucky enough, your laptop/netbook should have a USB port!

This guide will tell you how to create a bootable SD card or a USB flash drive with Symantec Norton Ghost.
This task can be done with several different versions of Symantec Ghost; however, the steps from this articles are based on Symantec Ghost 14.


What you need?
  • Symantec Ghost 14 bootable CD. (Some other versions might also work)
  • A PC with bootable CD/DVD drive.
  • An SD card (either SD or SDHC), or a USB thumb drive. The size can be as minimum as 1 GB. You can also pick a large SD card if you want to store your hard drive image to the card as well.
  • An SD slot or a card reader (for SD card) or a USB slot (for thumb drive)

Follow the steps in order. Use this guide at your own risks.

  1. First, check to make sure your CD/DVD drive is bootable. (See your BIOS manual or PC user guide for details since this is out of the scope of this article).
  2. - For SD card: Make sure the SD slot or the card reader is available. if it's a card reader, connect it to the PC. Also insert the card.
    - For USB thumb drive: Make sure the drive is inserted into one of the USB slots.
  3. Bootup the computer using the Symantec Ghost CD (Details vary on different computers). On Windows XP, during the startup, you should see the prompt "Press any key to boot from CD...".
  4. Once the Symantec Recovery startup is complete, you should see the main screen of Symantec Ghost 14 Recovery similar to this image:


  5. Select "Analyze" from the left menu.

  6. Then click on "Open Command Shell Window". A command prompt window will display.
  7. At this command prompt window, type: "diskpart" (one word, without quotes) and hit enter. The prompt now changed to "DISKPART>"
  8. Now type "list disk" and hit enter. You should now see a list of all available disks. Base on the size of each disk listed, find the one that matching your SD card (or thumb drive) and note its disk number under "Disk ###". If you don't see your SD card (or flash drive) listed, verify if it is inserted or plugged in (you might need to restart the computer and try again).
  9. Type "select disk " (replace with the disk # noted from the previous step) then hit enter.
    Important!! Besure to select the correct disk (your SD card or thumb drive) as you will be erasing the drive.
    Sample image with a 4-GB SD selected:


  10. Create a primary partition for the the disk by executing the following sequence of commands:
    clean
    create partition primary
    select partition 1
  11. Set the primary partition active, type: "active" and hit enter
  12. Perform a quick format with the following command:
    format fs=fat32 quick
  13. Then type:
    assign
    exit
  14. Your SD card (or the flash drive) is now bootable and will act similar to a local hard drive. In order to boot this card with Symantect Ghost Recovery, copy all contents from the Symantec Ghost disc to the SD card (or the flash drive). Besure to copy everything including any hidden files/folders.

    The SD card or flash drive is now bootable and will boot your laptop/netbook to Symantec Ghost Recovery utilities exactly the same way as of the CD (To boot with the card on your laptop/netbook, don't forget to set your bios to search for the SD card or USB external devices in the boot sequence).

Reset Windows Password

Reset Windows Password

Forgot your administrator password? Don't panic, it happens to some other people too, and you have found the solution! The following instructions will show you step-by-step how to reset your local Windows password. This only works for local user accounts, however, not domain accounts.The password recovery tool from this page is written by Petter Nordahl-Hagen, and the original information, as well as the downloadable tool, can be found from his website. According to the author, this tool should work for Windows NT/2000/XP/Vista.
WARNING! Users who have EFS encrypted files on the Windows XP or Vista computers will loose access to the EFS encrypted files after recovery of your password!
Use this trick at your own risks
The tool to reset your password can be downloaded here.

I. Download the bootdisk:
  1. Download the bootdisk, which includes the password recovery tool here. The file contains the ISO CD image.
  2. Unzip (extract) the ISO file and burn it to a CD. Note that this is an ISO file, you must burn it to CD as an ISO image, not as a "data" file. If you're not sure how, see this article. Also, the image is bootable, you need to burn the image to a CD using the image burning feature; do not extract the contents of the ISO and burn them to the CD, you'll end up with a CD that can't boot!

II. Understanding the process:
  • You'll use the bootdisk created from the above steps to bootup your computer, which you want to reset your administrator password.
  • You'll be asked for things like: which drive is the boot drive, which path to the SAM file, etc.. but don't worry, details will be provided.
  • Once you have selected an account to reset the password, you'll need to type in a new password; however, it is highly recommended to use a BLANK password at this point, then you can change your password later in Windows.
  • Follow the prompts to the end. You'll need to save the changes at the end!

III. OK! Enough talking. Here are the steps:
  1. Startup your computer with the bootdisk created above. You should see a welcome screen following with a prompt:
     boot:
    
  2. Just wait, the bootup process will continute automatically. Then you should see a screen similar to this:
     =========================================================
     . Step ONE: Select disk where the Windows installation is
     =========================================================
     ....
     NT partitions found:
      1 :   /dev/sda1    4001MB  Boot
      2 :   /dev/sda5    2148MB
     
     Please select partition by number or
     a = show all partitions, d = automatically load new disk drivers
     m = manually load new disk drivers
     l = relist NTFS/FAT partitions, q = quit
     Select: [1]
    
  3. Notice the last line "Select: [1]" which shows the [1] as default selection because the tool detected the bootup partition is [1]. This might be different on your own machine, so you should review the list shown under "NT partitions found:". The partition with the word "Boot" should be selected.
  4. Hit Enter once you confirm the selection. You should see a similar screen as follows:
     =========================================================
     . Step TWO: Select PATH and registry files
     =========================================================
     ....
     What is the path to the registry directory? (relative to windows disk)
     [windows/system32/config] :
    
  5. Notice the last line "[windows/system32/config]" which shows the default path. This was also detected by the tool. If the path is correct, hit Enter, or if you wish to enter a different path, enter it now then hit Enter.
    Here are the paths for different versions of Windows:
    - Windows NT 3.51: winnt35/system32/config
    - Windows NT 4 and Windows 2000: winnt/system32/config
    - Windows XP/2003 (and often Windows 2000 upgraded from Windows 98 or earlier): windows/system32/config
  6. Once you hit "Enter", you should see the next screen similar to the following:
     -r--------    1 0        0          262144 Jan 12 18:01 SAM
     -r--------    1 0        0          262144 Jan 12 18:01 SECURITY
     -r--------    1 0        0          262144 Jan 12 18:01 default
     -r--------    1 0        0         8912896 Jan 12 18:01 software
     -r--------    1 0        0         2359296 Jan 12 18:01 system
     dr-x------    1 0        0            4096 Sep  8 11:37 systemprofile
     -r--------    1 0        0          262144 Sep  8 11:53 userdiff
    
     Select which part of registry to load, use predefined choices
     or list the files with space as delimiter
     1 - Password reset [sam system security]
     2 - RecoveryConsole parameters [software]
     q - quit - return to previous
     [1]
    
  7. Hit "Enter" with the default option selected "[1]". Then ...:
     =========================================================
     . Step THREE: Password or registry edit
     =========================================================
     Loaded hives:   
    
       1 - Edit user data and passwords
       2 - Syskey status & change
       3 - RecoveryConsole settings
        - - -
       9 - Registry editor, now with full write support!
       q - Quit (you will be asked if there is something to save)
    
     What to do? [1] -> 1
    
  8. Hit "Enter" with the default option selected "[1]". Then ...:
     ===== chntpw Edit User Info & Passwords ====
    
     RID: 01f4, Username: 
     RID: 01f5, Username: , *disabled or locked*
     RID: 03e8, Username: , *disabled or locked*
     RID: 03eb, Username: , *disabled or locked*
     RID: 03ea, Username: , *disabled or locked*
    
     Select: ! - quit, . - list users, 0x - User with RID (hex)
     or simply enter the username to change: [Administrator]
    
  9. Hit "Enter" with the default option selected "[Administrator]", or select another user account. Here you can enter the full user account surrounded by < and >, CASE-SENSITIVE, or enter the RID number (i.e. 0x1f4). Assuming you select the Administrator account, you should see the following screen:
     RID     : 0500 [01f4]
     Username: Administrator
     fullname: 
     comment : Built-in account for administering the computer/domain
     homedir : 
    
     Account bits: 0x0210 =
     [ ] Disabled        | [ ] Homedir req.    | [ ] Passwd not req. | 
     [ ] Temp. duplicate | [X] Normal account  | [ ] NMS account     | 
     [ ] Domain trust ac | [ ] Wks trust act.  | [ ] Srv trust act   | 
     [X] Pwd don't expir | [ ] Auto lockout    | [ ] (unknown 0x08)  | 
     [ ] (unknown 0x10)  | [ ] (unknown 0x20)  | [ ] (unknown 0x40)  | 
    
     Failed login count: 0, while max tries is: 0
     Total  login count: 3
    
     * = blank the password (This may work better than setting a new password!)
     Enter nothing to leave it unchanged
     Please enter new password: *
    
  10. At the prompt "Please enter new password", Enter the * for a blank password (HIGHLY RECOMMENDED!) then press Enter
     Please enter new password: *
     Blanking password!
    
     Do you really wish to change it? (y/n) [n] y
    
  11. At the prompt, type in "y", then press Enter. Note that the default option is "n".
     Do you really wish to change it? (y/n) [n] y
     Changed!
    
     Select: ! - quit, . - list users, 0x - User with RID (hex)
     or simply enter the username to change: [Administrator] !
    
  12. Enter the "!" to go back to the main menu. Then select "q" at the following menu to quit:
     <>========<> chntpw Main Interactive Menu <>========<>
    
     Loaded hives:   
    
       1 - Edit user data and passwords
       2 - Syskey status & change
       3 - RecoveryConsole settings
        - - -
       9 - Registry editor, now with full write support!
       q - Quit (you will be asked if there is something to save)
    
     What to do? [1] -> q
    
  13. A prompt to save changes displays, enter "y" to save:
     =========================================================
     . Step FOUR: Writing back changes
     =========================================================
     About to write file(s) back! Do it? [n] : y
    
  14. The changes are saved! You should see the following screen, press Enter, and reboot your computer.
     Writing  sam
    
     ***** EDIT COMPLETE *****
    
     You can try again if it somehow failed, or you selected wrong
     New run? [n] : n
    
    
    Source: thecomputertricks.com

Wednesday, June 5, 2013

Top 10 Windows 8 tips and tricks

Customize your tiles
Windows 8 tilesMake the most of your Windows Start screen tiles by adjusting the sizes, where they are located, and what is listed.
  • Move any tile by clicking and dragging the tile. While moving a tile, if you need a larger view of the Start screen move the tile towards the top or bottom of the screen to zoom out.
  • Use your mouse wheel to scroll left-to-right through your tiles.
  • Any Desktop shortcut or program can be pinned to the Start screen by right-clicking the icon and choosing Pin to Start.
  • In the bottom right-hand corner of the start screen is a magnifying glass with tiles, click this icon to get a zoomed out view of your Start screen. In this view, if you right-click on a group of tiles you'll be given the option to name group, which can be useful if you have a group of related tiles (e.g. games). In this view, you can also click and drag a group to organize your tile groups.
  • Create a new speed bump between tile groups by moving a tile to a speed bump.
  • Resize any User tile or Live tile by right-clicking the tile and choosing resize.
  • If there is a tile you want on your Taskbar, right-click the tile and choose Pin to taskbar.
  • Show admin applications on the Start screen by clicking Settings in Charms, click Settings, and change the Show administrative tools from No to Yes.
  • In Internet Explorer 10, you can also pin any of your favorite web pages to your Start Screen.
Windows 8 keyboard shortcuts
Knowing at least some of the Windows 8 keyboard shortcuts will make your Windows 8 experience much more enjoyable. Try to memorize these top Windows 8 shortcut keys.
  • Press the Windows key to open the Start screen or switch to the Desktop (if open).
  • Press the Windows key + D will open the Windows Desktop.
  • Press the Windows key + . to pin and unpin Windows apps on the side of the screen.
  • Press the Windows key + X to open the power user menu, which gives you access to many of the features most power users would want (e.g. Device Manager and Command Prompt).
  • Press the Windows key + C to open the Charms.
  • Press the Windows key + I to open the Settings, which is the same Settings found in Charms.
  • Press and hold the Windows key + Tab to show open apps.
  • Press the Windows key + Print screen to create a screen shot, which is automatically saved into your My Pictures folder.
See our Windows shortcuts page for a full listing of all Windows shortcuts.
Know your hot corners
The corners on your screen are hot corners and give you access to different Windows features. Below, is a brief explanation of each of these corners.
Bottom Left-hand corner
The bottom left-hand hot corner of the screen will allow you to access the Start screen, if you're in the Start screen and have the Desktop open, this corner will open the Desktop from the Start screen.
Tip: Right-clicking in the left hand corner will open the power user menu.
Top-left corner of the screen
Moving the mouse to the top-left corner and then down will display all the apps running on the computer. Clicking and dragging any of these apps to the left or right-hand side of the screen will snap that app to that side of the screen. Each of these open app icons can also be right-clicked to close or snap.
Right-hand side of the screen
On the full right-hand side of the screen will be given access to the Windows Charms.
Taking advantage of search
The Search in Windows 8 has been significantly improved when compared to all previous versions of Windows. To search for a file or run a program in Windows 8 from the Start screen just start typing what you're trying to find or want to run.
As you begin typing, the results will start appearing on the left-hand side. In addition to being able to search for files and run programs, the Search also supports limiting the search to apps such as Finance, People, Maps, Photos, Mail, Music, Videos, Weather, and much more. If what you are searching for is not a file or program, click on the app you wish to use as the search. For example, if you were searching for "New York" and selected the Weather App you would be shown the weather in New York, NY.
By default, Search organizes the available Apps by how frequently they are used and then in alphabetical order. If you want to keep your favorite app at the top of the Search list, right-click the app and choose Pin. Pinning the app will lock it in place regardless of how often it is used. If there is an app you don't want (e.g. Finance) you can turn on and off any of the search apps through the PC settings, which is found under the Settings in the Charms.
Bonus tip: The Search is also found through Charms and can also be opened by pressing Windows key + F.
Running two apps side by side
Any app can be pinned to the left or right-hand side of the screen. For example, open the People app and then press the Windows Key + . (period) to move that app to the right-hand side of the screen, pressing the same keys again will move it to the left-hand side, and pressing the same keys again will make it full screen. While an app is pinned, any other app or program can be opened and loaded into the available space on the screen. For example, in the below picture, we've opened a browser window and have the People app running to monitor our social networks.
Windows 8 People
Any open app can also be pinned using your mouse by clicking at the top of the tile and dragging it to the left or right-hand side of the screen.
Bonus tip: The Desktop can also be pinned to the left or right-hand side of the screen.
Note: In order for snap to work properly your resolution must be at least 1,366 x 768.
Windows 8 Task Manager
The Windows 8 Task Manager has been significantly improved over previous versions of Windows. Some of the new changes include showing a total percent usage at the top of your Processes, which makes it easier to determine total memory and CPU usage, improved Performance graphs, a Startup tab to see startup processes and their impact to system performance, and the App history tab (as shown below) that gives you the total resources an app has used over a period of time. Press Ctrl + Shift + Esc to start exploring the new Task Manager.
Windows 8 Task Manager
Use a picture password to log into your computer
Windows 8 includes a new feature called Picture password, which allows you to authenticate with the computer using a series of gestures that include circles, straight lines, and taps. Enable this feature if you want a new way to access your computer or have a hard time with passwords.
  1. Open the Windows Charms.
  2. Click Settings and then More PC settings
  3. In the PC settings window click Users and then select Create a picture password
Bonus tip: A four digit pin password can also be created and used to access your computer.
Take advantage of Windows 8 apps
Windows 8 comes included with several apps to help you get the most from your computer. Below are just a few of the included apps.
People
Microsoft touts the People feature in Windows 8 because they understand how many people are using social networks today. In the People feature you'll be able to connect your Windows computer to all the major social networks including Facebook, LinkedIn, and Twitter. Once connected, you can pin the people app and monitor your social network (as shown below), use People in Search to find people, and get an overview of what is happening in all your social networks.
Windows 8 People
Reader
The Reader app will give you PDF support right out of the box.
SkyDrive
The SkyDrive app will give you access to the Microsoft cloud service SkyDrive, which allows you to store your photos, documents, and other files in the cloud and access or share those files with any computer with Internet access.
Store
Take advantage of the Windows Store and install one or more of the thousands of available apps designed for Windows 8. The Store is found in the Start screen, or use Search to search the Store app for any apps that you are trying to find.
Know the answers to common questions
Windows 8 is the biggest change to Microsoft Windows since the introduction of Windows 95, which was released all the way back in 1995. Since so many people have grown up with Windows, it can be difficult to transition to a new way of doing things. Below, is a short list of the most common questions previous Windows users will have.
Know the Jargon
Knowing all the new jargon introduced with Windows 8 will help improve your familiarity with Windows 8 and make it a more enjoyable experience. Below, are just a few links to the most commonly used Windows 8 terms.
Source: computerhope.com

USE KEYBOARD WITH MOUSE (ON SCREEN KEYBOARD)

USE KEYBOARD WITH MOUSE

If you feel that your external keyboard is not working properly or some particular key is not functioning then you can use internal keyboard on your desktop screen. This property of keyboard is found in windows xp and seven. Just follow these steps
Go to start menu and press “run”
Type  “osk”
Now press enter.
(note. Don’t use commas)
you will see keyboard on your desktop screen. Now use mouse to click on keys for operation.

NTLDR Missing: Solution


Issue:-
NTLDR is Missing.

Related errors:-
Below are the full error messages that may be seen when the computer is booting:-

1. NTLDR is Missing
Press any key to restart

2. Boot: Couldn't find NTLDR
Please insert another disk

3. NTLDR is missing
Press Ctrl Alt Del to Restart

Causes:-

    1. Computer is booting from a non-bootable source.
    2. Computer hard disk drive is not properly setup in BIOS.
    3. Corrupt NTLDR and NTDETECT.COM file.
    4. Misconfiguration with the boot.ini file.
    5. Attempting to upgrade from a Windows 95, 98, or ME computer that is using FAT32.
    6. New hard disk drive being added.
    7. Corrupt boot sector / master boot record.
    8. Seriously corrupted version of Windows 2000 or Windows XP.
    9. Loose or Faulty IDE/EIDE hard disk drive cable.
    10. Failing to enable USB keyboard support in the BIOS.

Solutions:-
Computer is booting from a non-bootable source


Many times this error is caused when the computer is attempting to boot from a non-bootablefloppy disk or CD-ROM. First verify that no floppy diskette or CD is in the computer, unless you are attempting to boot from a diskette.

Note: This error has also been known to occur when a memory stick is in a card reader and the computer is attempting to boot from it. If you have any card reader or flash reader make sure that no memory stick is inside the computer. Additionally disconnect all USB drives, cameras, ipods, iphones, etc. from the computer.

If you are attempting to boot from a floppy diskette and are receiving this error message it is likely that the diskette does not have all the necessary files or is corrupt.

If you are attempting to install Windows XP or Windows 2000 and are receiving this error message as the computer is booting verify that your computer BIOS has the proper boot settings. For example, if you are attempting to run the install from the CD-ROM make sure the CD-ROM is the first boot device, and not the hard disk drive.

Second, when the computer is booting you should receive the below prompt.
Press any key to boot from the CD

Important: When you see this message press any key such as the Enter key immediately, otherwise it will try booting from the hard drive and likely get the NTLDR error again.

Note: If you are not receiving the above message and your BIOS boot options are set properly it's also possible that your CD-ROM drive may not be booting from the CD-ROM properly. Verify the jumpers are set properly on the CD-ROM drive.


Windows XP users:-

    1. Insert the Windows XP bootable CD into the computer.
    2. When prompted to press any key to boot from the CD, press any key.
    3. Once in the Windows XP setup menu press the "R" key to repair Windows.
    4. Log into your Windows installation by pressing the "1" key and pressing enter.
    5. You will then be prompted for your administrator password, enter that password.
    6. Copy the below two files to the root directory of the primary hard disk.

    In the below example we are copying these files from the CD-ROM drive letter, which in this case is "e." This letter may be different on your computer.

    copy e:\i386\ntldr c:\
    copy e:\i386\ntdetect.com c:\
    7. Once both of these files have been successfully copied, remove the CD   from the computer and reboot. 

INCREASE SPEED OF HARD DISK

INCREASE SPEED OF HARD DISK

It is common observation that some times our computer slows down due to low performance of hard drive. This problem happens due to the slow performance or poor speed of hard drive. When we say about poor performance, actually we mean, poor speed of reading/writing of hard drive. This problem can be solved by increasing the hard drive speed. Follow these steps to solve your problem.


Click Start menu and select run.
Now type (sysedit.exe) in run and press enter.
System configuration editor will appear.
Here you can see some multiple windows but you will select (system.ini).
This window contains a line (386enh)
Now after this line type (irq14=4096)
Now close this window and save it.
Reboot your computer now.
You will surely feel better performance of your computer.
Enjoy.

Sunday, June 2, 2013

start Windows in Safe Mode or Safe Mode with Networking


Start Windows 7/Vista/XP in Safe Mode with Networking


start Windows in Safe Mode or Safe Mode with Networking

  • Immediately after the computer is powered on or restarted (usually after you hear your computer beep),tap the F8 key in 1 second intervals . 
  • After your computer displays the hardware information and runs the memory test, the Advanced Boot Options menu will appear.
  • Use the arrow keys to select Safe Mode or Safe Mode with Networking and press ENTER. For more information about Safe Mode options, click here for Windows XP or click here for Windows Vista/Windows 7.

start Windows in Safe Mode or Safe Mode with Networking


Start Windows 8 in Safe Mode with networking

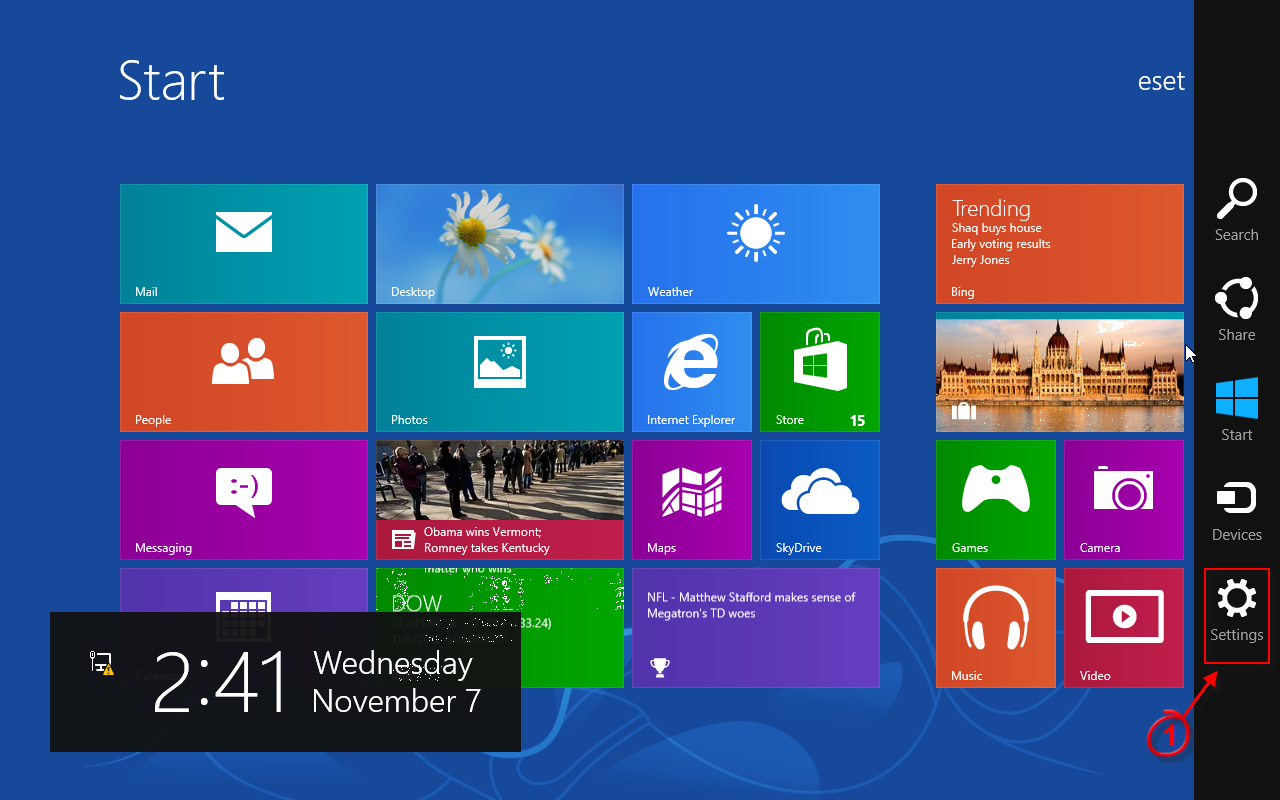
1. Press the Windows key     + C, and then click Settings.

start Windows in Safe Mode or Safe Mode with Networking


2. Click Power, hold down Shift on your keyboard and click Restart.


start Windows in Safe Mode or Safe Mode with Networking


3. Click Troubleshoot.

start Windows in Safe Mode or Safe Mode with Networking


4. Click Advanced options.


start Windows in Safe Mode or Safe Mode with Networking


5. Click Startup Settings.

start Windows in Safe Mode or Safe Mode with Networking


6. Click Restart.

start Windows in Safe Mode or Safe Mode with Networking


7. Press 5 on your keyboard to Enable Safe Mode with Networking. Windows will start in Safe Mode with Networking.


start Windows in Safe Mode or Safe Mode with Networking